How to write great melodies
In the following video I will show you how you can create great, strong melodies fast and efficiently. You can find a transcript of the video below!
Introduction
For many people, writing melodies is a bit of a mystery. Especially in the beginning, you never know from where to pick the right notes. You make some random experiments and sometimes it's ok and sometimes - not so much.
However, I want to show you a more structured way. It's quite common among songwriters and it will help you to write better melodies quicker and more reliably than before.
Basic concept
Basically, it's pretty easy. Instead of going from note to note we take a step back and look at the melody from a different perspective. We need to look at two different things:
First, the melodic rhythm.
The melodic rhythm consists of the position, the length, and the velocity of the notes.
So, it's like a drum rhythm - but with notes.
And secondly, we have the melodic shape.
The shape will tell us how high or low a note should be played at a certain position.
When we combine these two things, we get a new powerful way to create nice melodies.
In this tutorial, I will show you how you can do that in your own productions. I will use Sundog for that. Sundog is a standalone software. It is connected to my DAW with a virtual MIDI cable. So, Sundog will send MIDI notes to the DAW, and the DAW will play them back.
The track in the video tutorial is quite basic. Just a pad, a bassline, and some drums.
Sundog is basically built in such a way that melodic rhythm and melodic shape are two separate things.
First, I click on "Fill editor with basic sequence". And now you see a red line, that is identical to the melodic shape.
And in the bottom rectangle, we have the melodic rhythm pattern.
OK, let's take a look at the basics.
Six basic shapes
Each melody consists of simple components. And I will show you the six basic components that you can use to build nice melodies.
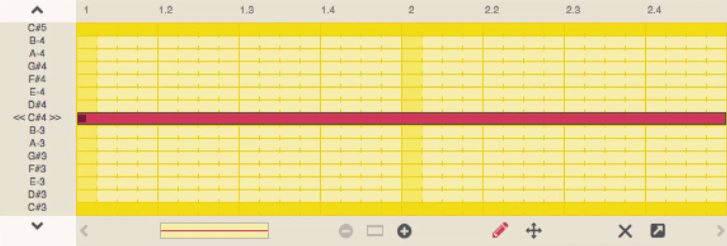
The first one is the static line. It's simply the same note on and on:
The second one is the ascending line. It simply goes up:
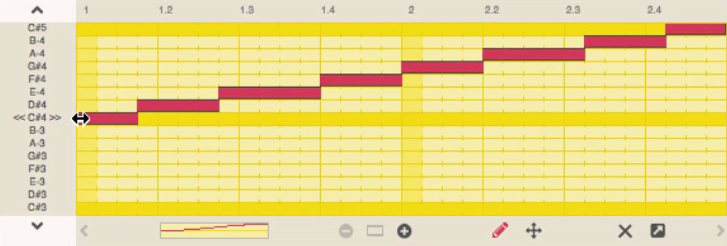
Maybe you wonder where the notes come from. In Sundog, you simply pick a scale from the top right menu. I chose Minor for example. And then, Sundog will automatically use these scale notes for the melodic shape.
This way, you always stay harmonic, because other notes won't get used at all.
You can also play around with the steepness of the line. Steep lines are quite dynamic and expressive. Choose a flat angle if you need less action.
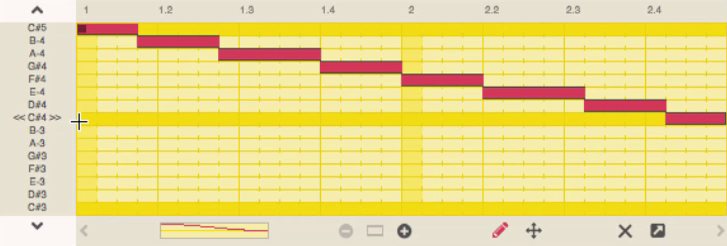
The next basic shape is the descending line:
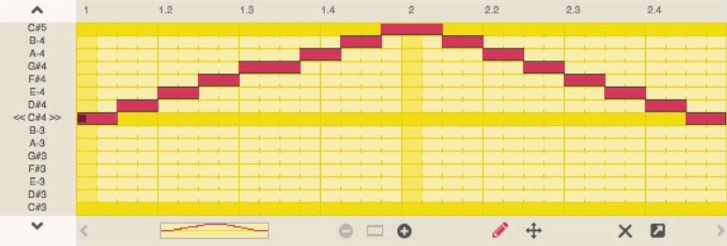
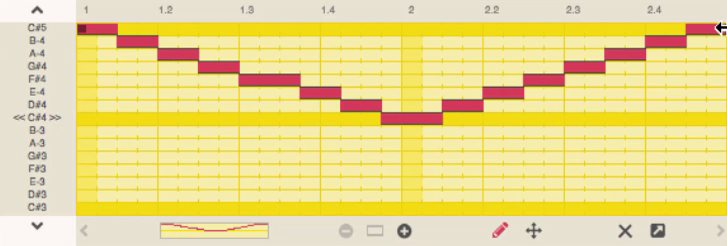
The next one: Up... and down:
And of course: Down... and up.
A first phrase
You can combine these basic shapes to create more complex phrases.
For example, I go up and down and up again - and then stay on a note:
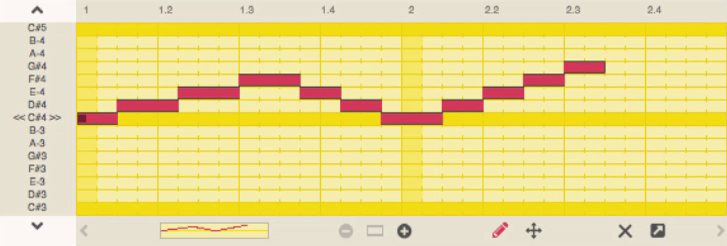
These basic shapes offer you a lot of flexibility.
Call and response
Of course, my example was quite short. In reality, melodies are usually longer.
Let's change the length from two bars to four bars.
Sundog will create a copy for us and put it on the second half of the field.
I will use this copy to show you another technique, that is great for longer melodies. This technique is called "Call and response".
The idea is simple: You divide the field in two parts. The first part is the call, the second part is the answer (or response).
The second part can be a variation of the first part or anything else that gives your listener a feeling of resolution. It is important that the first part feels like something unresolved. Like something that you want to complete somehow.
For example, I will keep the beginning of the second section the same. But then I will end the second part with a downward movement:
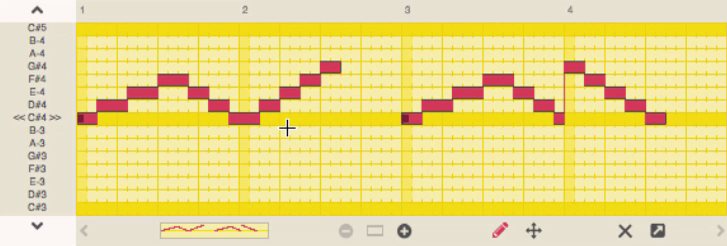
I used a nice little trick here: The strong yellow line is the root note of the scale, a C#. This note should be the most important note for your melodies as well, because your listeners will need to have a home note. When your listeners can feel the home note, they can also feel when you leave home, and when you return home.
This is why many melodies start on the root note, and/or come back to it in the end.
Sundog tricks
OK, I will show you another example now. And I will also show you some other tricks how you can use the Sundog editor more efficiently. First, let's clear the lines by pressing the cross.
And now we draw a simple, short line.
So far, we always worked in the draw mode. But Sundog contains another mode, the edit mode.
You can switch between draw and edit with these icons. And you can also press "b" on the keyboard for that.
In edit mode, you can select lines with your mouse. You can use keyboard shortcuts like copy and paste as usual. But you can also hold down Cmd on Mac or Ctrl on Windows, and then drag a line with your mouse. This will create an instant copy.
The melody at 08:08min is another example for a simple call and response melody. It's like: Leaving home, leaving home, coming back, coming back:
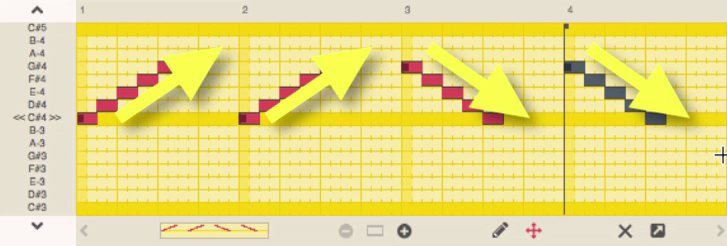
And another tip: You can hold down Shift and then select multiple lines. And you can also move selected lines with the arrow keys.
MIDI export
When you are happy with your melodies, you can export them as a MIDI file. Simply hold down your mouse on the MIDI icon, and then drag it to your DAW.
If you want to know more about different Sundog techniques, you can click on "Help -> Quickstart help".
You can learn more about the editor - like using multiple rhythms - at http://feelyoursound.com/advanced-sundog/.
Download Sundog here: http://feelyoursound.com/download-sundog/.